
Still wondering why your foundation looks flat or greasy after adding highlighter? You’re not alone. Most people mess this up. They treat highlighter like foundation, or worse, mix it haphazardly. Stop. There’s a proper way to get that coveted glow without looking like a disco ball.
Why You’re Mixing It Wrong (And How to Fix It)
Let’s be blunt: if you’re mixing a substantial amount of liquid highlighter directly into your foundation and applying it all over your face, you’re doing it wrong. Period. This isn’t about creating an all-over shimmer; it’s about strategic radiance. You end up with a foundation that moves differently, often settles poorly, and makes your entire face look uniformly shiny, not glowing.
The Problem with Full-Face Mixing
Mixing highlighter with foundation dilutes the foundation’s coverage and can alter its finish dramatically. If your foundation is designed to be semi-matte, adding a dewy highlighter can turn it into an oily mess by midday. It also makes your pores look larger and emphasizes texture you wanted to conceal. Brands like Fenty Beauty offer foundations with specific finishes for a reason; don’t undermine them by adding shimmer everywhere.
Your skin naturally glows in specific areas, where light hits it. Think cheekbones, brow bones, the bridge of your nose. When you blanket your face in shimmer, you lose that natural dimension. It looks artificial. It looks like you tried too hard. And frankly, it’s just a waste of product.
Strategic Placement is Key
The fix is simple: treat your highlighter as an accent, not an ingredient. Apply it where you want light to hit, not where you want coverage. Think of it as the final touch that brings life back to your face after you’ve evened out your skin tone with foundation. This means applying it on top of or underneath your foundation, but rarely mixed into a full-face application.
For a subtle, all-over luminosity that looks like it’s coming from within, a glow-enhancing primer or a sheer liquid luminizer applied to bare skin or under foundation is a better bet. Think of products like Charlotte Tilbury’s Hollywood Flawless Filter — it’s designed to give that effect without compromising your foundation. It’s not a highlighter you mix in, it’s a base product. See the difference?
Choosing the Right Highlighter Type for Your Foundation
The type of highlighter you use matters, especially when considering its interaction with your foundation. Some combinations are just destined for disaster. A powder highlighter over a dewy liquid foundation often results in patchy application. Know your tools.
Cream vs. Liquid: What’s the Difference?
Cream and liquid highlighters are your best friends for a seamless, natural glow, especially when paired with liquid or cream foundations. They blend effortlessly, melting into the skin rather than sitting on top. Liquid highlighters, like those from Rare Beauty, can be incredibly versatile. A tiny dot can go a long way.
- Cream Highlighters: Often in stick or pot form. They’re great for a dewy, skin-like finish. Best applied by tapping with fingers or a damp sponge. They meld beautifully with cream blushes and bronzers.
- Liquid Highlighters: Come in droppers or tubes. They’re usually more concentrated. A small amount is crucial. They can be mixed with moisturizer for a sheer body glow, or dabbed precisely on the face.
The key here is their emollient nature. They move with your skin and blend without creating harsh lines or disrupting your foundation underneath. This is critical for avoiding that dreaded cakey look.
Powder Highlighters: A Different Beast
Powder highlighters, such as those from NARS or MAC Cosmetics, are fantastic, but they require a lighter touch and specific timing. Applying powder over a still-wet liquid foundation is a rookie mistake. It will cling, create streaks, and look uneven.
Powder highlighters work best over a set, powdered foundation. If you’re using a liquid or cream foundation, apply it, let it dry, perhaps set it lightly with a translucent powder in your T-zone, and then sweep your powder highlighter onto the high points of your face. This prevents tugging on the foundation and ensures a smooth, even shimmer. If you skip powdering your foundation first, you risk lifting or smudging your base layer when applying a powder highlighter.
Application Techniques That Actually Work
Forget the full-face mix. These are the methods that actually give you a luminous, professional finish. Pay attention; this is where most people go wrong.
The “Under-Foundation” Glow Method
This technique is for those who want an all-over, lit-from-within look without visible shimmer. It’s subtle, but effective. Apply a liquid illuminator or a very sheer liquid highlighter to your bare skin after moisturizer, before foundation. Focus on the high points—cheekbones, brow bones, cupid’s bow. Let it set for a minute.
Then, apply your foundation *over* these areas. Use a damp sponge or a brush and pat, don’t drag. The foundation will slightly sheer out the glow, leaving a soft radiance that seems to emanate from beneath your skin. It’s undetectable, not glittery. This is how you look naturally radiant, not like you’re covered in product. Think of it as a glow primer.
Targeted Highlighting: After Foundation
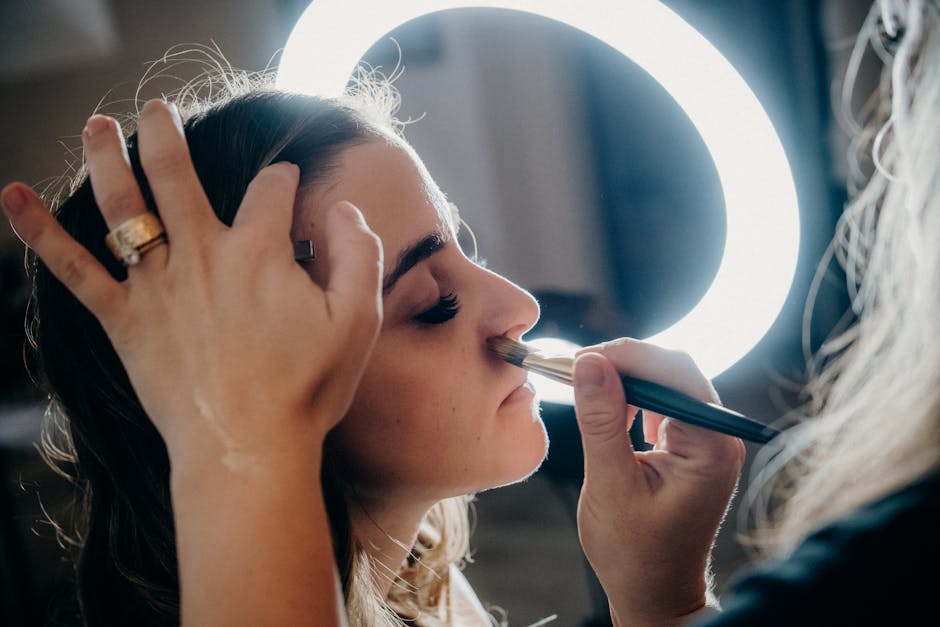
This is the most common and often the most effective method for adding noticeable radiance. Apply your foundation, concealer, and any cream contour or blush first. Then, for liquid or cream highlighters, dab a small amount onto your cheekbones, brow bone, inner corner of the eye, and cupid’s bow. Use your finger or a small, dense brush to gently tap and blend the product into your skin. Blend, don’t rub. You’re trying to meld it with the foundation, not remove it.
For powder highlighters, wait until your foundation is fully set and optionally powdered. Use a fluffy brush (fan brushes are overrated; a small, tapered brush gives more precision) to lightly sweep the powder onto the same high points. Layering is fine, but build slowly. You can always add more; taking away is harder.
Blending Secrets for a Seamless Finish
Blending is non-negotiable. Poor blending is why highlighters look streaky or like a distinct stripe on the face. Your highlighter should seamlessly transition into your skin and foundation.
- Use a Damp Sponge: For liquid and cream highlighters, a damp beauty sponge is your best friend. After applying the product, lightly bounce the sponge over the edges to diffuse the shimmer.
- Fingers for Warmth: Your body heat helps melt cream highlighters into the skin for a natural finish. Tap, don’t smear.
- Light Hand with Brushes: For powder highlighters, use a very light hand. Start with minimal product and build. Swirl the brush in small circles on the edges of the highlight to blend it out.
- Check in Different Lights: Always check your makeup in natural light and various indoor lighting. What looks subtle in one light can look aggressive in another. No one wants to walk around with an obvious stripe on their cheek.
Your Top Highlighter Questions, Answered

Got questions? Good. There are too many myths out there. Let’s clear them up.
Can I use body highlighter on my face?
Generally, no. Most body highlighters are formulated with larger glitter particles, stronger pigments, and sometimes even scents that are not suitable or safe for delicate facial skin. They are designed to be seen from a distance and cover larger areas. The texture can be too heavy, the shimmer too chunky, and the ingredients potentially irritating. Stick to products specifically formulated for the face. It’s not worth the breakout or the clownish sparkle.
How much is too much?
If you can see the highlighter from across the room without direct light hitting your face, it’s probably too much. If you have visible glitter particles all over your face instead of a sheen, it’s too much. The goal is to catch the light, not to emit light. A good rule of thumb: start with a tiny amount. You can always add a little more. You want a sophisticated glow, not a child’s art project.
Does highlighter work on mature skin?
Absolutely, yes. But with caveats. For mature skin, avoid highlighters with chunky glitter or those that are excessively shimmery, especially in powder form. These can settle into fine lines and wrinkles, emphasizing them instead of minimizing them. Opt for liquid or cream formulas with a very fine pearl or dewy finish. Apply sparingly to the highest points of the cheekbones, avoiding the undereye area and any deep-set lines. A subtle sheen can make mature skin look more vibrant and youthful, but texture is your enemy here. Brands like Hourglass offer finely milled, subtle highlighters that work beautifully.
| Highlighter Finish Type | Best For | Application Notes | Associated Brands (Examples) |
|---|---|---|---|
| Sheer Dewy Radiance | Natural, ‘lit-from-within’ look; dry/normal skin; subtle everyday wear | Apply under or over foundation; tap with fingers/sponge; avoids visible shimmer. | Glossier, Charlotte Tilbury (Flawless Filter) |
| Subtle Shimmer | Versatile, buildable glow; all skin types; adds dimension without glitter. | Targeted application post-foundation; blend edges well; cream or fine powder. | Rare Beauty, Fenty Beauty (Liquid Killawatt) |
| Intense Metallic/Beam | High impact, dramatic look; special occasions; oily/combination skin (with care). | Sparse, precise application over set foundation; powder or concentrated liquid. | NARS (Highlighting Powders), MAC Cosmetics |
| Glittery/Chunky | Avoid for face, best for body or editorial looks; can emphasize texture. | Not recommended for a natural facial glow; usually found in body products. |
Sheer Radiance vs. Blinding Beam
This is about preference, but also suitability. Sheer radiance is a universally flattering finish. It mimics healthy, hydrated skin. It’s what makes you look awake and fresh. It’s the safe bet.
A blinding beam, on the other hand, is a statement. It’s for when you want your cheekbones to be seen from space. There’s nothing inherently wrong with it, but it requires more skill and a better understanding of light. If you’re going for a blinding beam, ensure your skin texture is smooth, your foundation is flawless, and the rest of your makeup is balanced. Otherwise, it just looks messy.
Matte Foundation with Glow: A Smart Combo
Combining a matte foundation with strategic highlighter is a pro move. Matte foundations provide excellent coverage and oil control, but they can sometimes make the skin look flat. Adding a carefully placed liquid or cream highlighter on top brings back dimension and a healthy glow without sacrificing the benefits of your matte base.
The trick here is to let your matte foundation fully dry and set before applying any wet highlighter. If you want to use a powder highlighter, lightly powder your T-zone first. This contrast creates a beautiful effect: perfected, shine-free skin in most areas, with a deliberate, luminous pop where you want it. It’s sophisticated and modern.
Don’t Overthink It, Just Get The Right Tools
You want a radiant, healthy look, not a greasy, glittery mess. The key is understanding how light interacts with your face and using the right formulas in the right places. Stop mixing highlighter into your foundation for an all-over application. Use it strategically, as an accent. That’s how you go from looking flat or overly shiny to genuinely glowing. Now go get that light.


